


Master the Craft Digitizing for Embroidery Made Simple
Embroidery digitizing might sound like a high-tech skill reserved for industry pros, but its actually something anyone can learn with a bit of patience and the right guidance. Whether youre a hobbyist looking to personalize your projects or a small business owner wanting to expand your offerings, understanding the process ofdigitizing for embroidery opens up a world of creative possibilities.
What Is Embroidery Digitizing?
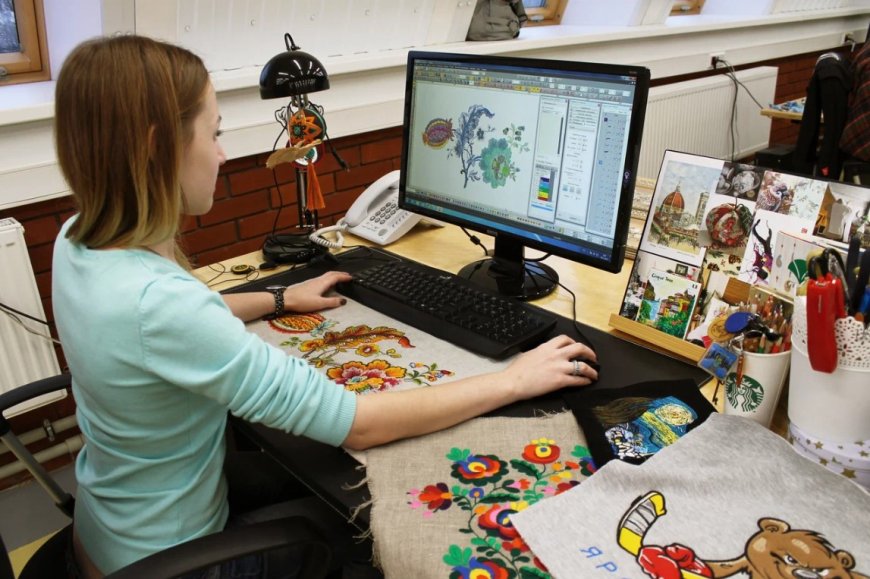
At its core, digitizing is the process of converting artwork into a digital file that an embroidery machine can read. Think of it like giving your machine a set of instructionswhere to stitch, what colors to use, and in what order. Without a properly digitized file, even the most advanced embroidery machine wont know what to do.
The catch? Not all designs translate perfectly into stitches. A graphic that looks stunning on paper or screen might need adjustments to work as embroidery. Thats where digitizing comes inits all about optimizing the design so it stitches out cleanly and looks fantastic on fabric.
Why Digitizing Matters
You might wonder,Why cant I just upload any image and hit "stitch"?Well, embroidery machines dont interpret images the way printers do. They follow a sequence of commandslike moving the needle up and down, changing threads, and adjusting stitch direction. A poorly digitized file can lead to thread breaks, uneven stitching, or designs that just dont look right.
Good digitizing ensures:
- Clean, crisp details No blurred edges or messy fills.
- Proper stitch density Too many stitches can make the fabric stiff; too few can leave gaps.
- Efficient thread changes Minimizing unnecessary color swaps saves time and thread.
- Durability A well-digitized design holds up better after washing and wearing.
The Basics of Digitizing for Embroidery
1. Start with the Right Artwork
Not all images are digitizing-friendly. Simple, high-contrast designs with clean lines work best. Intricate logos with tiny text or gradients? Those might need simplification. If youre working with a complex design, consider breaking it into layers or adjusting elements to make them stitch-friendly.
2. Choose Your Software
Youll need embroidery digitizing software to create the machine-readable file (usually in formats like .DST, .PES, or .EXP). Some popular options include:
- Wilcom EmbroideryStudio Industry-standard but pricey.
- Hatch Embroidery More affordable with great features for beginners.
- SewArt A budget-friendly auto-digitizing option (though manual tweaking is often needed).
Free or cheap auto-digitizing tools exist, but they often produce mediocre results. If youre serious about quality, investing in good software pays off.
3. Understand Stitch Types
Embroidery designs use different stitch types, each serving a purpose:
- Running Stitch Simple lines, great for outlines and fine details.
- Satin Stitch Smooth, shiny stitches ideal for text and borders.
- Fill Stitch Covers larger areas with a pattern (like zigzag or crosshatch).
Knowing when to use each type is key. For example, satin stitches work well for lettering, but using them on large areas can waste thread and cause puckering.
4. Set the Right Stitch Direction
Stitch direction affects how light reflects off the thread, influencing the designs appearance. For a natural look, change stitch angles in different sectionslike radiating stitches in a flower petal or vertical stitches in a tree trunk.
5. Adjust Stitch Density
Too many stitches too close together can make the fabric stiff or cause puckering. Too few, and the fabric shows through. Finding the right balance depends on the fabric typethicker materials like denim can handle denser stitches, while lightweight knits need a lighter touch.
6. Add Underlay Stitches
Underlay is like the foundation of a buildingit stabilizes the fabric before the top stitches go on. Common types include:
- Center Run A single line of stitching that anchors the design.
- Edge Run Outlines the shape to prevent fabric distortion.
- Zigzag Underlay Provides a mesh-like base for fill stitches.
Skipping underlay might save time, but your design wont hold up as well.
7. Test and Refine
Even experienced digitizers test their designs before finalizing. Stitch out a sample to check for issues like thread breaks, misaligned elements, or puckering. Make adjustments as neededdigitizing is often a process of tweaking until its just right.
Common Digitizing Mistakes to Avoid
1. Ignoring Fabric Type
A design digitized for thick twill wont stitch the same way on stretchy jersey. Always consider the fabric when setting stitch density and underlay.
2. Overcomplicating Small Details
Tiny text or intricate details might look great on screen but turn into a blurry mess when stitched. Simplify where necessarysometimes less is more.
3. Poor Pathing
The order in which the machine stitches matters. Jumping back and forth between distant sections wastes time and thread. Optimize the path for efficiency.
4. Forgetting About Push and Pull
Embroidery machines tug on the fabric as they stitch, which can distort shapes. Compensate by slightly elongating or adjusting elements in the digitizing phase.
Tips for Better Digitizing
- Start simple Master basic designs before tackling complex ones.
- Learn from existing designs Open high-quality embroidery files in your software to study how theyre constructed.
- Keep an eye on thread tension Even a perfectly digitized design can fail if the machines tension is off.
- Practice on scrap fabric Test different settings to see how they affect the final result.
Final Thoughts
Digitizing for embroidery isnt magicits a skill that improves with practice. The more you experiment, the better youll understand how stitches interact with fabric, how to optimize designs, and how to troubleshoot issues.
Whether youre digitizing for fun or profit, the key is patience. Your first few attempts might not be perfect, but each one teaches you something new. Soon enough, youll be turning any idea into a beautifully stitched reality.
So fire up your software, grab some fabric, and start stitching your way to digitizing mastery!